Mobile App Testing Using Appium MCP Server
Enhancing mobile testing with AI through the integration of Appium and MCP Server.
Mobile app testing has always been critical yet challenging. Traditional approaches with Appium require hours of manual work—locating elements, writing boilerplate code, and debugging complex workflows. The Appium MCP (Model Context Protocol) Server changes this paradigm entirely.
With MCP, AI assistants can run UI tests, capture screenshots, analyze screen elements, and report results — all without manual scripting. This guide explores how to leverage the Appium MCP Server to transform your mobile testing workflow.
What is the Model Context Protocol?
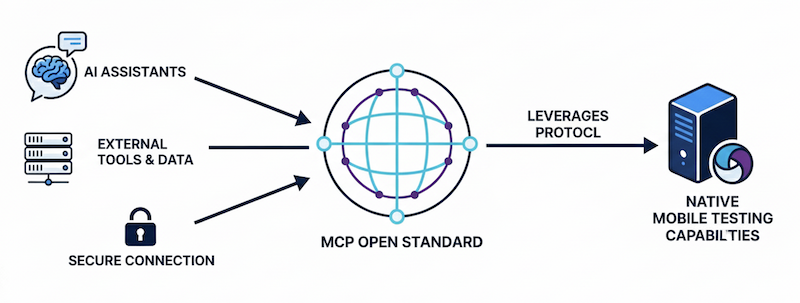
The Model Context Protocol (MCP) is an open standard that enables AI assistants to securely connect with external tools and data sources. Think of it as a universal translator between AI and development tools. The Appium MCP Server uses this protocol to give AI assistants native access to mobile testing capabilities.
Understanding the Appium MCP Server
Appium MCP Server enables AI assistants like GitHub Copilot, Claude, and other MCP-compatible tools to interact directly with mobile devices and simulators, making test automation more accessible and intelligent than ever before. It wraps standard Appium automation commands into a set of "tools" that an AI can understand and use.
Instead of writing complex test scripts, you can simply tell the AI: "Open the Settings app and toggle Wi-Fi," and it executes that command on a real device or emulator.
How It Works
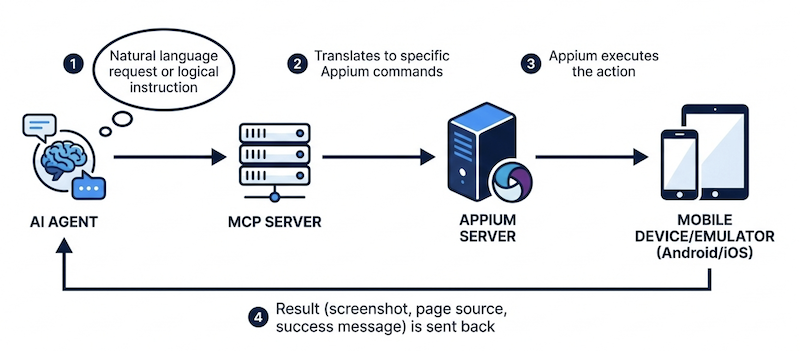
The architecture is straightforward:
- AI Agent sends a natural language request or logical instruction.
- MCP Server translates this into specific Appium commands.
- Appium executes the action on the Android or iOS device.
- Result (a screenshot, page source, or status) returns to the AI for context
This creates a feedback loop where the AI understands what happened and can adapt accordingly.
Available Implementations
Several open-source implementations exist, each with similar core functionality but different configurations:
- appium-mcp Official implementation by the Appium team
- @gavrix/appium-mcp Implementation by Sergey Gavrilyuk
- mobile-mcp Implementation by Mobile Next
- mcp-appium-server Implementation by Rahul Sharma
For this guide, we'll use @gavrix/appium-mcp as our reference implementation.
Getting Started: Prerequisites
Before diving in, ensure you have the following installed and configured:
Core Requirements
Node.js (v22 or higher)
Required for running the MCP server and npm packages.
Java Development Kit (JDK) (8 or higher)
Appium requires Java to run, so make sure you have the JDK installed. You can find the latest JDK available for free on the Oracle website.
Set JAVA_HOME in your .zshrc or .bash_profile:
export JAVA_HOME=$(/usr/libexec/java_home)
export PATH=$JAVA_HOME/bin:$PATH
VS Code Editor
Your primary development environment for this workflow.
GitHub Account & Copilot
GitHub Copilot provides the AI-powered agent that communicates with the MCP server. A free tier is available.
Appium Server (v2.0 or higher)
Install Appium globally using npm:
npm install -g appium
Start the server (listens on port 4723 by default):
appium
Platform-Specific Setup
Android Setup
- Install Android Studio and Android SDK Platform Tools
- Create an Android Virtual Device (AVD) or connect a physical device with USB debugging enabled.
- Set the ANDROID_HOME environment variable in your .zshrc or .bash_profile:
export ANDROID_HOME=$HOME/Library/Android/sdk
export PATH=$ANDROID_HOME/emulator:$ANDROID_HOME/tools:$ANDROID_HOME/tools/bin:$ANDROID_HOME/platform-tools:$PATH
- Install the Appium UiAutomator2 driver dependencies
Important: Ensure an Android emulator is running before executing tests.
iOS Setup
- Install Xcode from the Mac App Store
- Install Xcode Command Line Tools:
xcode-select --install
- Set up an iOS Simulator or configure a physical device
- For real devices, obtain necessary provisioning profiles and certificates
- Install Appium XCUITest driver dependencies.
Important: Ensure an iOS Simulator is running before executing tests.
WebDriverIO Configuration
For JavaScript-based testing, WebDriverIO is recommended for its maintenance and Appium compatibility.
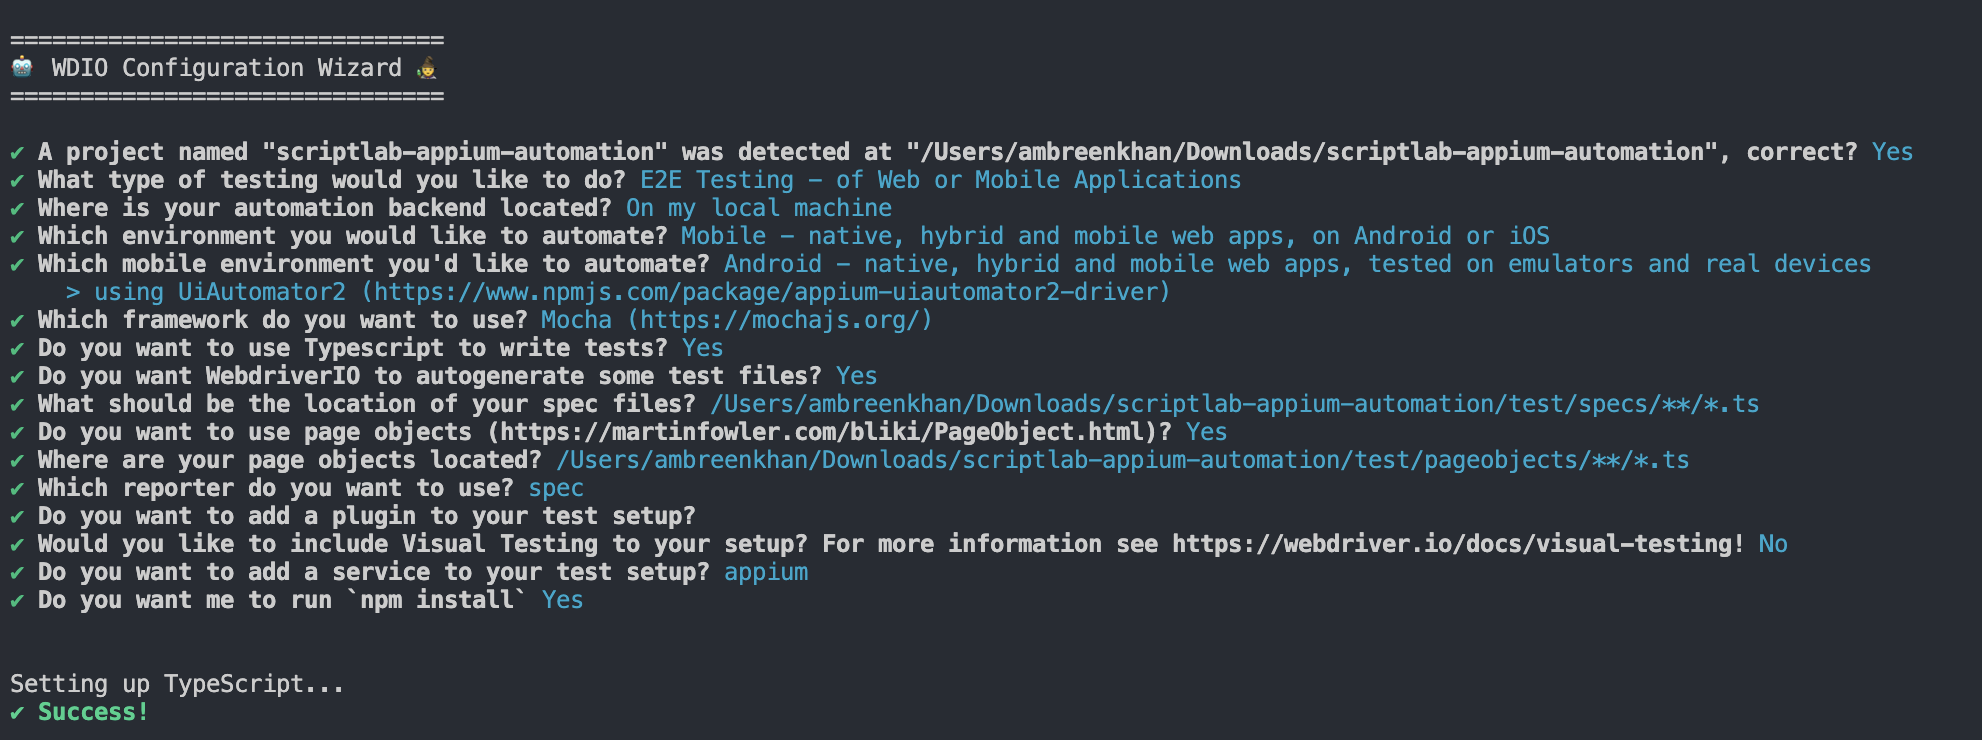
Initialize WebDriverIO:
npm init wdio@latest .
Follow the setup wizard and choose the appropriate options for your project.
Configuration Files
Create platform-specific configuration files:
wdio.android.conf.ts
import { config as baseConfig } from "./wdio.conf.js";

export const config: WebdriverIO.Config = {
  ...baseConfig,

  // Override capabilities for Android
  capabilities: [
    {
      // capabilities for local Appium native app tests on Android Emulator
      platformName: "Android",
      "appium:deviceName": "sdk_gphone64_arm64",
      "appium:platformVersion": "36",
      "appium:automationName": "UiAutomator2",
      "appium:udid": "emulator-5554",
      "appium:app": "./apps/android/app-debug.apk",
      "appium:appPackage": "com.scriptlab",
      "appium:appActivity": ".MainActivity",
      "appium:newCommandTimeout": 600,
      "appium:noReset": false,
    },
  ],
};
wdio.ios.conf.ts
import { config as baseConfig } from "./wdio.conf.js";

export const config: WebdriverIO.Config = {
  ...baseConfig,

  // Override capabilities for iOS
  capabilities: [
    {
      // capabilities for local Appium native app tests on iOS Simulator
      platformName: "iOS",
      "appium:deviceName": "iPhone 15 Pro",
      "appium:platformVersion": "17.5",
      "appium:automationName": "XCUITest",
      "appium:app":
        "./apps/ios/ScriptLabMobile.app",
      "appium:noReset": false,
    },
  ],
};
Note: Update app paths to match your actual application locations.
MCP Server Setup
Step 1: Copilot Instructions File:
Create .github/copilot-instructions.md in your repository root to guide the AI on using MCP tools effectively. Write instructions in Markdown format using natural language.
Note: Create the .github directory if it does not already exist.
Reference example: Sample copilot-instructions.md.
Step 2: Install MCP Server Package
npm install @gavrix/appium-mcp
Step 3: Create Capabilities File
Create capabilities.json file to define your device and app configurations for Appium MCP Server. Update the app paths to your app locations.
{
  "android": {
    "platformName": "Android",
    "appium:platformVersion": "12",
    "appium:deviceName": "Android Emulator",
    "appium:app": "<PATH_TO_YOUR_ANDROID_APP>",
    "appium:automationName": "UiAutomator2",
    "appium:ensureWebviewsHavePages": true,
    "appium:nativeWebScreenshot": true,
    "appium:newCommandTimeout": 3600,
    "appium:connectHardwareKeyboard": true
  },
  "ios": {
    "platformName": "iOS",
    "appium:platformVersion": "18.6",
    "appium:deviceName": "iPhone 16",
    "appium:app": "<PATH_TO_YOUR_IOS_APP>",
    "appium:automationName": "XCUITest",
    "appium:ensureWebviewsHavePages": true,
    "appium:nativeWebScreenshot": true,
    "appium:newCommandTimeout": 3600,
    "appium:connectHardwareKeyboard": true
  }
}
Step 4: Configure MCP in VS Code
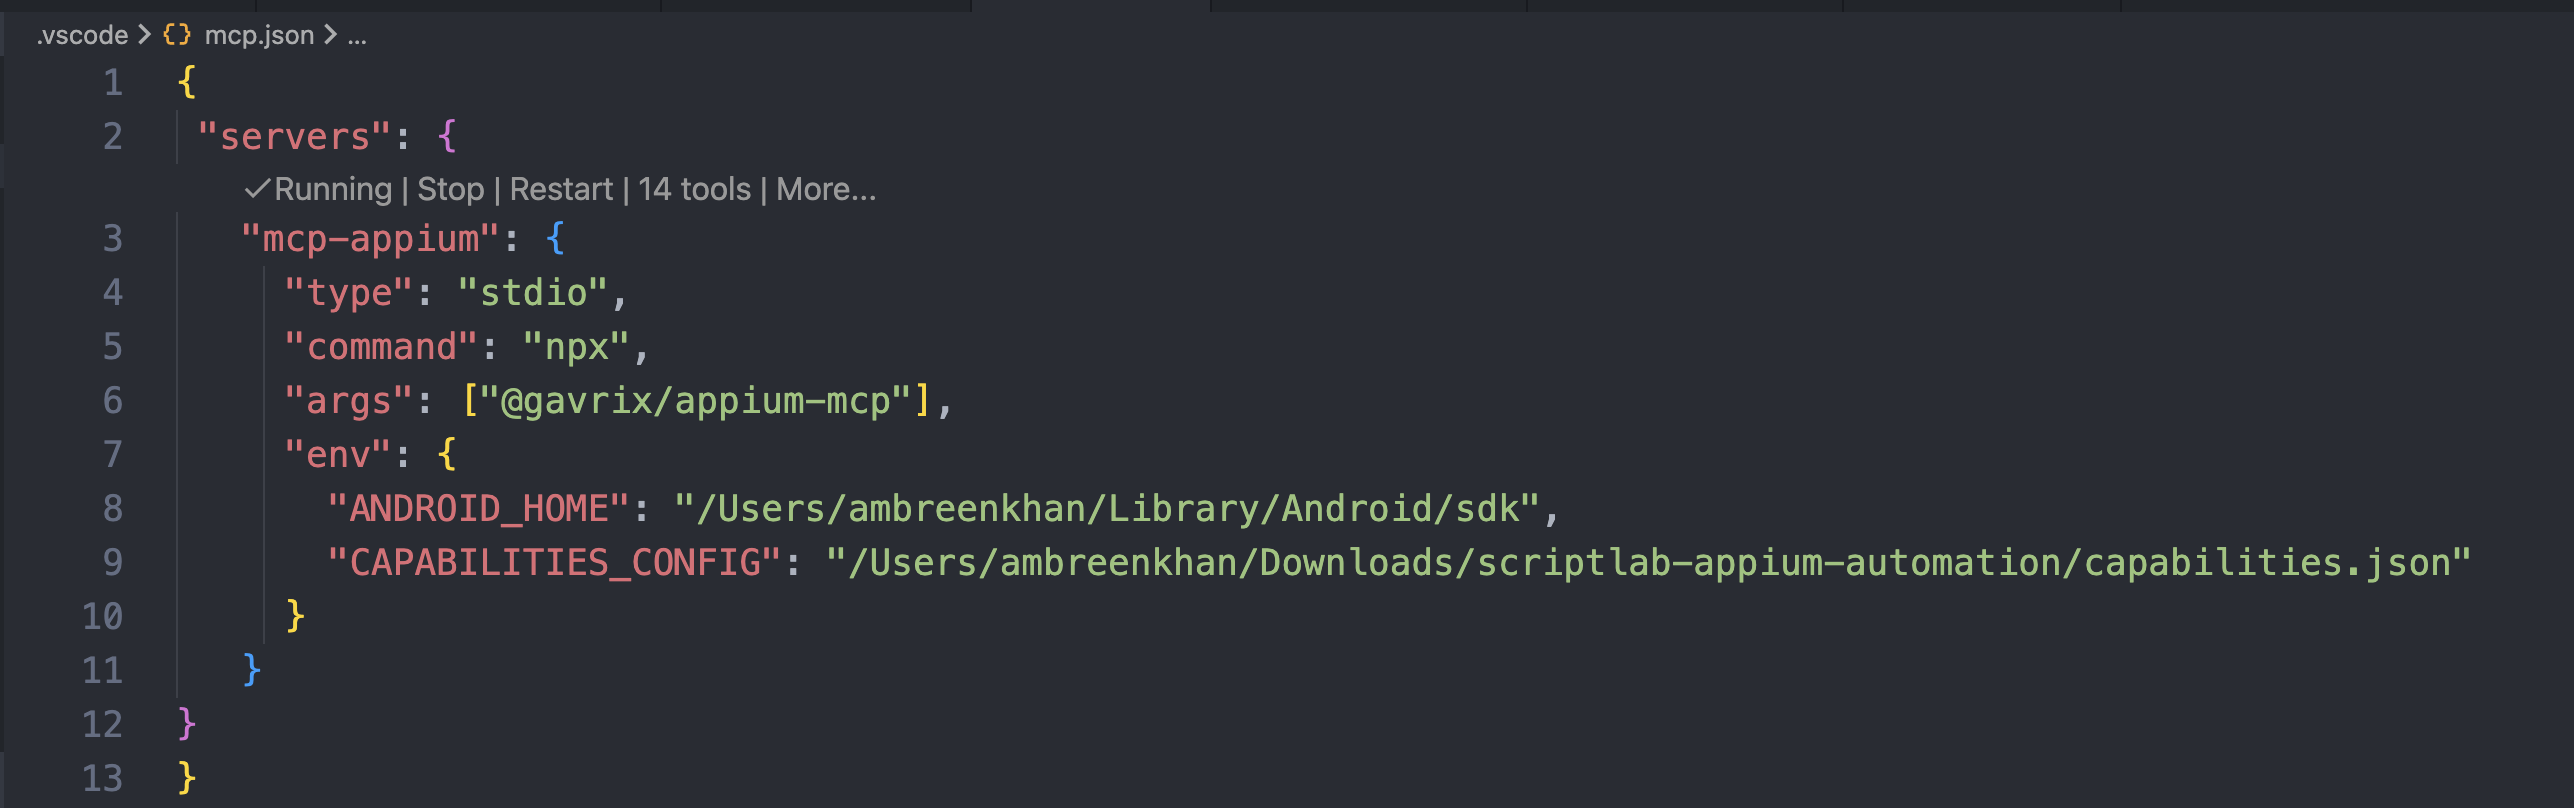
Create .vscode/mcp.json:
{
  "servers": {
    "mcp-appium": {
      "type": "stdio",
      "command": "npx",
      "args": ["@gavrix/appium-mcp"],
      "env": {
        "ANDROID_HOME": "</PATH/TO/ANDROID/SDK>",
        "CAPABILITIES_CONFIG": "</PATH/TO/capabilities.json>"
      }
    }
  }
}
Step 5: Start the Server
Once everything is set up, you can start the Appium MCP Server by clicking on the Start text in your json file to start the MCP server.
Once running, you can begin issuing natural language commands through GitHub Copilot.
Step 6: Enable Agent Mode
Open GitHub Copilot and switch to Agent Mode. Click the tools icon and remove unnecessary servers to keep context clean. You should see the Appium MCP Server listed as an available tool.
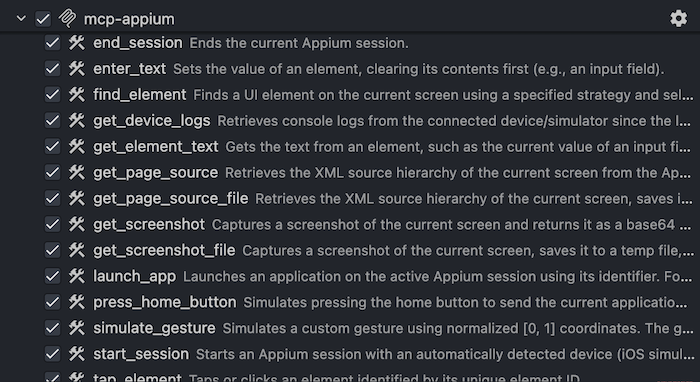
Appium MCP Server: Tool Reference
The Appium MCP Server provides a comprehensive set of tools for agent-based mobile testing. These tools enable full control over the mobile testing lifecycle without manual scripting.
1. Session Management Tools
Start Session
Automatically detects and connects to an available iOS simulator or Android emulator/device. Supports platform targeting or auto-detection.
End Session
Gracefully terminates the active Appium session and frees resources.
Launch App
Launches or restarts an application using its bundle ID (iOS) or package name (Android).
2. Element Interaction
Find Element
Locates UI elements using standard Appium locator strategies (accessibility ID, XPath, resource ID, iOS predicates, Android UIAutomator, etc.).
Tap Element
Simulates user taps or clicks on identified UI elements.
Enter Text
Clears and inputs text into fields such as forms, search boxes, or login inputs.
Get Element Text
Reads visible text or values from UI elements for validation and assertions.
3. Gestures & Navigation Tools
Simulate Gesture
Executes custom touch gestures (swipe, drag, multi-touch) using normalized W3C action coordinates.
Press Home Button
Sends the app to the background without ending the session, useful for lifecycle and state tests.
4. Screen Capture & UI Analysis Tools
Get Screenshot / Screenshot File
Captures the current screen either as a base64 string or a saved file.
Get Page Source / Page Source File
Retrieves the full XML UI hierarchy of the current screen, optionally saving it to disk.
5. Debugging & Diagnostics Tools
Get Device Logs
Retrieves device or simulator logs since the last request and clears the buffer afterward.
Typical Workflow
- Start an Appium session
- Launch the target app
- Discover and interact with UI elements
- Perform gestures and navigation
- Capture screenshots and UI hierarchy
- Collect device logs
- End the session
Creating Tests from Natural Language
To create an E2E test case using Github Copilot in Agent Mode, follow these steps:
1. Write your prompt
Write a clear and concise prompt in natural language describing the E2E test case you want to automate. For example:
1. Start an Appium session and launch the app on an Android Emulator.
2. Sign in with username "scriptlab" and password "scriptlab123".
3. Verify navigation to the home screen after successful login.
4. Confirm the text "ScriptLab Mobile!" appears on the home screen.

Write these steps as an E2E test case using Appium & WebdriverIO.
Follow guidelines in copilot-instructions.md.
2. Execute via Github Copilot
Run the prompt in Agent Mode. Copilot will request permission before sensitive actions — grant access to proceed.
3. Review Generated Code:
Ensure the code follows best practices and meets your requirements.
4. Run and Validate
Execute the test and verify it passes with expected behavior.
5. Debug if Needed
If failures occur, analyze logs and screenshots, then adjust code accordingly.
6. Finalize
Integrate the working test into your test suite.
7. Create iOS Version
Repeat the process for iOS platform testing.
Real-World Use Cases
1. Plain English Automation
Instead of hours writing test code, describe your intent:
"Click on the forms tab, enter 'ABCDF' into the input field, and toggle the switch."
The AI interprets this, maps it to UI elements, and executes instantly—generating complete test implementation including locators, interactions, and assertions.
See the video below for a walkthrough of how it works:
2. Streamlined Element Selection
Finding elements via Appium Inspector is tedious—constantly opening the app, refreshing source, copying selectors. The MCP Server automates this entirely. Simply prompt the server to analyze screens or navigate through the app to extract locators automatically.
See the video below for a walkthrough of how it works:
3. Automated App Exploration and Documentation
Beyond writing tests, the Appium MCP Server acts as an intelligent crawler for your application. You can instruct the agent to perform a complete audit of your application. It will systematically explore the navigation structure, identifying every accessible screen, view, and state. You can ask the agent to create a markdown file with exploration results .This is invaluable for documentation, onboarding new testers, and ensuring comprehensive test coverage.
Check out the video below to see how it works:
4. Multilingual Validation
Eliminate manual navigation across languages. Set target locales and let the server automatically capture every screen. AI-driven validation checks UI text for accurate translations and proper formatting across all locales.
5. Intelligent Debugging
When tests fail, AI can:
- Capture failure-point screenshots
- Analyze page source to diagnose issues
- Review device logs for error messages
- Suggest fixes based on the context
6. Cross-Platform Testing
Use the same natural language test description for both iOS and Android. The AI handles platform-specific differences automatically.
7. Reduced Learning Curve
New team members can start contributing to test automation immediately, even without deep Appium expertise. The AI acts as a knowledgeable pair programmer, guiding them through best practices.
The Future of AI-Powered Testing
Appium MCP Server represents a significant step forward in making mobile test automation more accessible, efficient, and intelligent. By enabling AI assistants to directly interact with mobile devices, we're moving toward a future where:
- Test maintenance is automated: AI can detect UI changes and update tests automatically
- Flaky tests are self-healing: AI can analyze failures and suggest stability improvements
- Visual regression testing is intelligent: AI can understand meaningful visual differences vs. noise
- Test coverage gaps are identified: AI can analyze app flows and suggest missing test scenarios
Conclusion
The Appium MCP Server transforms mobile automation from a code-heavy, manual-inspection task into a streamlined, intent-driven workflow. By combining the power of Appium with the intelligence of AI assistants through the Model Context Protocol, we're empowering developers to create better tests faster, with less friction and more confidence.
Ready to revolutionize your mobile testing? Explore the Appium MCP Server documentation and start building smarter tests today.